ADA Trip Hazards Don’t Wait for Budget Season: A California Parking Lot Compliance Playbook

It’s the week before Thanksgiving. A customer catches a toe on the lip between old asphalt and a concrete ramp.
They fall, the manager writes an incident report, and a demand letter lands in your inbox two days later. Budgets won’t be approved for another six weeks. Meanwhile, holiday traffic is building and your tenants are anxious.
You don’t need perfect. You need a defensible plan—fast.
This playbook shows how to turn panic into progress: a practical walk-through to document risk, a way to prioritize fixes that matter most, and a phasing model that keeps your site open while you remediate. It’s written for California property and facility managers, but the sequence applies anywhere the ADA and local codes intersect with real-world operations.
Compliance Note
This article provides general guidance for facility managers in California and is not legal advice. Always confirm requirements with your jurisdiction and inspector.
Why ADA Risk Spikes in Parking Lots
Parking lots take more daily abuse—and more scrutiny—than almost any other surface on a property.
Between weather, traffic, and constant patchwork repairs, small imperfections can quickly turn into ADA violations or liability risks if they’re not caught early.
These three triggers cause the most headaches:
Surface discontinuities. Heaves from tree roots, settling around utility lids, potholes at drive lanes, and rough transitions at ramps create abrupt vertical changes. Even a small lip at a pedestrian route can become a claim magnet when foot traffic is heavy.
Non-compliant slopes and cross-slopes. Accessible stalls, access aisles, routes to entrances, and landings all have slope limits. Over time, overlays and patchwork can introduce subtle grade problems that aren’t obvious at a glance but are measurable—and enforceable.
Signage and markings that drift out of spec. Faded striping, missing van spaces or access aisles, signs mounted too low or hidden by landscaping—these are low effort to fix, but they often get missed until an inspection or incident.
Issues tend to hide where materials meet: asphalt to concrete at ramp toes, truncated dome panels at drive aisles, and around catch basins that collect water and accelerate raveling.
Add seasonal variables like holiday surges, limited weather windows for coatings and striping, and jurisdictional permitting lead times, and “we’ll fix it later” becomes risky.
The right mindset is to eliminate high-exposure hazards first, prove credible progress on the rest, and schedule programmatic improvements on a realistic calendar. Courts and inspectors look for plan and progress, not promises. Document your conditions, rank your fixes, then get moving.
The 60-Minute Walk-Audit That Can Save You Months of Headaches
A quick, structured walk-through can reveal 90% of your ADA exposure before an inspector—or a customer—does. In just an hour, you can document risks, rank priorities, and build a credible plan that shows real progress toward compliance.
Spend an hour on site and come away with photos, simple measurements, and a marked-up plan.
What to bring
- 24" level or digital level for quick slope checks
- Tape measure
- A coin or wedge gauge to show vertical lips in photos
- Chalk or painter’s tape to flag hazards as you go
- Clipboard/tablet for notes; cones for any immediate issues
Route to follow
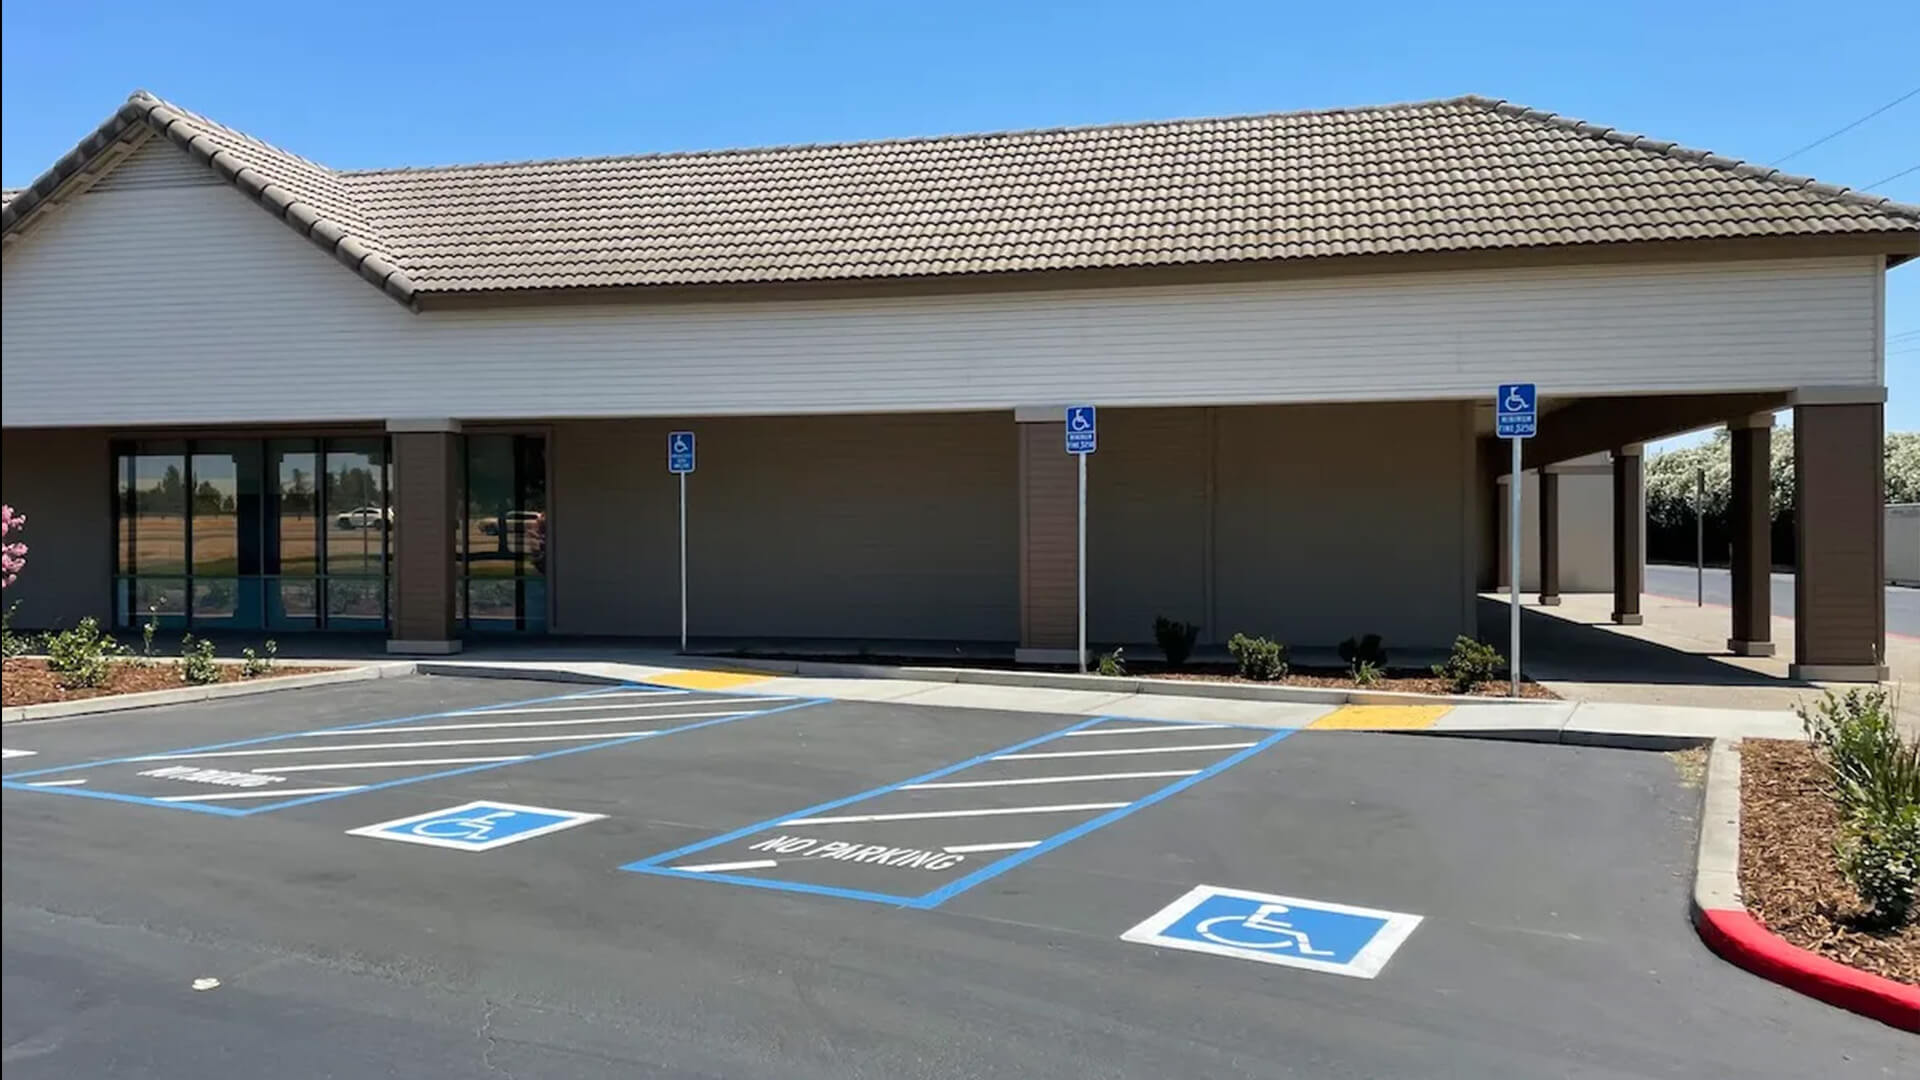
- Start at accessible stalls nearest to the primary entrance.
Verify stall counts for the site size, presence of at least one van-accessible space per facility, access aisles, and clean, legible striping. Check sign condition and height—are they visible above hood level and not obscured by shrubs? - Follow the accessible route from stall to entrance.
Look for abrupt vertical changes at joints and ramp transitions, ponding or slick areas, and obstructions (planters, display racks) that force pedestrians into drive lanes. Take photos that show scale: coin at the lip, level on a landing. - Inspect ramps and landings.
Confirm that landings are level, that handrails are present where required and in good shape, and that transitions at top and bottom are smooth. Note cracked or spalled concrete at ramp edges. - Check detectable warnings (truncated domes).
Panels should be present at curb ramps, aligned with crosswalks, and intact. Missing tiles, brittle plastics, or misaligned mats are common and easy for inspectors to spot. - Scan pedestrian paths through the lot.
Crosswalk visibility, stop bars, yield markings, and sightlines matter. Faded paint isn’t just cosmetic; it changes behavior and risk in the field. - Note utility lids, catch basins, and dumpster pads.
Settling and rutting at high-load zones and turning radii point to structural distress that won’t be solved with striping alone.
Capture everything with simple, consistent photos and brief notes. You’re building a record that says: we know our conditions, we ranked the risks, and we’re executing a plan.
Prioritize Like a Pro: Risk-First, Budget-Smart
When every repair feels urgent, clear prioritization turns chaos into control.
By ranking fixes by risk and effort, you can reduce liability fast while keeping budgets—and operations—on track. Rank work by liability × likelihood × effort to remedy so you can move quickly on what matters most.
Priority 1: Immediate hazards
- Abrupt vertical changes at pedestrian routes, ramp toes, or landings
- Missing or severely damaged detectable warnings at active curb ramps
- Broken or loose handrails where required
- Illegible access aisles or missing van stalls at main entrances
These are the “fix now” items—often resolved with grind/patch, panel lift/replace, sign and striping refresh, or dome replacement. Many can be handled in night or early-morning windows with minimal disruption.
Priority 2: High-probability citations
- Incorrect stall counts or layouts based on current occupancy
- Signage mounted too low or hidden; wrong legends or arrows
- Cross-slope issues on accessible routes that require targeted milling or overlay
- Deteriorated surfaces that create trip potential even if not yet a “lip”
These typically need a scoped work order with clearly defined details. If permits are required, initiate them while Priority 1 is underway.
Priority 3: Programmatic improvements
- Re-layout to improve circulation and pedestrian safety
- Long runs of crack sealing and a sealcoat with fresh markings
- Strategic overlays to correct grades or extend pavement life
- Concrete panel replacements at dumpster pads, loading areas, and high-turn radii
These are best tackled in planned windows and can be bundled for economies of scale across multiple properties.
Keep Your Property Open and Your Tenants Happy: Smart Phasing for Live Sites
Smooth execution isn’t just about pouring asphalt—it’s about keeping doors open and people moving while you do it.
With the right phasing and communication plan, you can complete ADA and pavement work without lost revenue, tenant frustration, or safety compromises.
Choose a phasing model that fits the site
- Quadrant approach. Divide the lot into four sections. Keep half open at all times; rotate closures across nights and low-traffic periods. This provides clear, predictable access and keeps ADA routes intact.
- Drive-lane first. Establish safe, signed pedestrian routes and functioning drive lanes before touching stall fields. Then close and complete one row or bank at a time.
- Night/shoulder windows. Sawcut and patch at night; stripe at dawn; open by mid-morning. Reserve longer cure-time scopes (e.g., certain coatings) for days when you have redundancy in access.
Maintain ADA continuity during construction
- Post clear temporary paths of travel with directional arrows to entrances
- Use portable ramps where appropriate to bridge minor grade changes
- Protect access aisles and keep at least one van route open when feasible
- Cone off active work zones with wide buffers to discourage shortcut foot traffic
Set expectations early and often
- Inform tenants and on-site teams of dates, sections, cure times, and parking alternates
- Use simple site maps that show which areas close when, and where pedestrians should walk
- Provide day-of signage at lot entries and key decision points to reduce confusion
Quality controls that speed sign-off
- Capture “after” photos from the same angles as “before”
- Record measurements on the spot: slopes, landing dimensions, sign heights
- Close each phase with a punchlist walk, especially where jurisdictions require inspection
Small, visible wins—fresh access aisles, new domes, smooth transitions—build trust while larger fixes follow.
Quick Answers That Keep Your Projects Moving
These FAQs cut through the red tape and help you make fast, informed decisions about ADA compliance, parking lot design, and day-to-day maintenance—so nothing slows your next project down.
What’s included in an ADA parking lot compliance audit?
A practical audit documents stall counts and markings, sign condition and height, accessible routes from stalls to entrances, ramp and landing conditions, detectable warnings, and obvious surface defects. It should include photos, simple measurements, and a marked-up plan that ranks issues by risk.
How many accessible parking spaces are required for my property size?
Requirements scale with the total number of spaces and must include at least one van-accessible stall per facility. Confirm counts against current occupancy and any recent field changes; when in doubt, align to California Building Code and ADA guidance for your jurisdiction.
How do I maintain ADA access during parking lot construction?
Post and maintain temporary paths of travel, preserve or provide van access where feasible, use portable ramps to bridge small transitions, and phase closures so at least one compliant route remains open. Clear wayfinding signs reduce confusion and complaints.
What are common ADA trip hazards in parking lots?
Abrupt vertical changes at ramp transitions and joints, heaves or potholes in pedestrian paths, broken or missing detectable warnings, and spalled concrete at landings. Faded or missing access aisles also create risk by changing behavior in the field.
What’s the difference between van-accessible and standard accessible stalls?
Van stalls provide additional width or an adjacent wider access aisle and require specific signage. They should be located along the shortest accessible route to an entrance, with slopes within limits and clear headroom where routes pass under structures.
How often should I re-stripe and re-inspect for ADA issues?
Most high-traffic properties benefit from annual or biennial re-striping and a quick walk-audit at the same cadence, with spot checks after major weather events or heavy maintenance. Treat it like fire-life-safety: predictable, scheduled, and documented.
The Easy Button: How A-1 Advantage De-Risks ADA Work
If your job is to keep properties safe, compliant, and open, the vendor should make things simpler—not add moving parts. Here’s what “easy button” looks like in practice:
Single-source crews. Asphalt, concrete, striping, signage, and handrails under one roof, coordinated by a project manager who’s accountable for the whole picture.
Speed to safe. Rapid-response hazard removal for Priority 1 while permits and details are prepared for bigger items, so risk drops immediately and keeps dropping.
Inspector-friendly documentation. Standard photo sets, slope readings, sign heights, and detail sheets aligned to Northern California jurisdictions shorten closeout and reduce rework.
Live-site experts. Night and weekend phasing, traffic control, and clear tenant communications are baked into the plan—not treated as afterthoughts.
Regional capacity. A team that works across Sacramento, the Bay Area, and the Central Valley can standardize details and pricing across your portfolio, then phase work property by property without reinventing the wheel.
Ready to move from panic to plan?
Bring us your list—or we’ll walk the site with you—and we’ll build a risk-first, operations-friendly scope that cuts liability fast and keeps your properties open.
Get in touch here to get the ball rolling.


